Most healthcare practitioners using JaneApp never know how many of their appointment bookings actually come from their website traffic. You’re probably spending money on ads or SEO without understanding which efforts are driving real bookings. That’s a problem.
You can track JaneApp appointment bookings in Google Analytics 4 by setting up custom events that fire when patients complete a booking through your embedded JaneApp scheduler. This gives you visibility into the full patient journey, from their first website visit to their booked appointment.
The setup requires connecting JaneApp’s booking confirmation with GA4’s event tracking system. Once configured, you’ll see exactly which marketing channels bring in actual appointments, not just website clicks. This article walks you through the technical setup and shows you how to optimize your data flow for accurate attribution.
How to Track JaneApp Appointment Bookings in GA4
To track appointment bookings from JaneApp in GA4, you need to set up your Google Analytics account, connect it using your Measurement ID, configure custom events, and mark those events as key conversions.
Setting Up Your Google Analytics Account and GA4 Property
You’ll need a Google Analytics account before tracking anything. If you don’t have one, go to analytics.google.com and sign in with your Google account.
Click the “Start measuring” button to create your account. Google will ask you to name your account and configure data-sharing settings.
Next, create a GA4 property for your practice. This property is where all your JaneApp data will live. Enter your property name, select your time zone, and choose your currency.
Complete the property setup by adding details about your business. Google Analytics 4 will then generate your property and provide you with a Measurement ID that starts with “G-“. Write this down because you’ll need it in the next step!
Connecting JaneApp to GA4 with the Measurement ID
Your Measurement ID is the bridge between JaneApp and Google Analytics 4. Log into your JaneApp account and navigate to the settings area.
Look for the integrations or tracking section in your JaneApp dashboard. JaneApp has a field specifically for a Google Analytics tracking code.
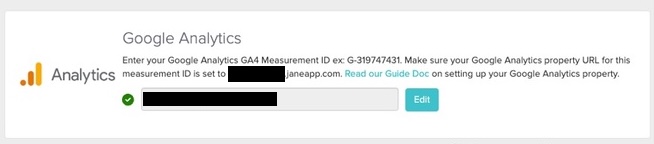
Paste your Measurement ID (the one starting with “G-“) into the appropriate field. Make sure you copy the entire ID without any extra spaces!
Save your changes and test the connection. You can verify it’s working by checking the real-time reports in GA4 within a few minutes.
Configuring Event Tracking for Appointment Bookings
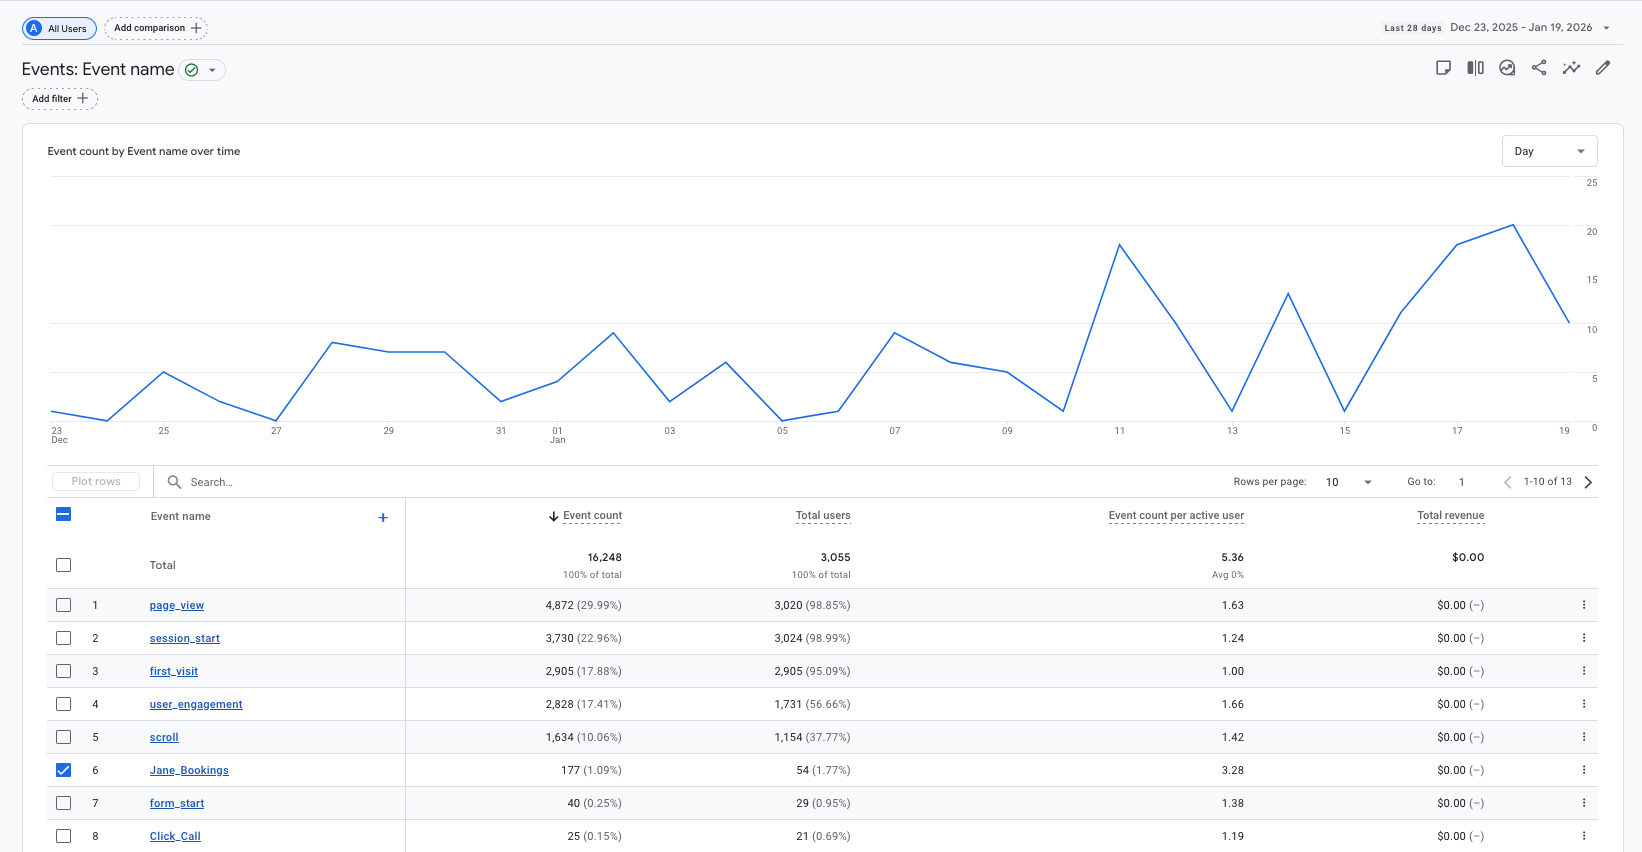
GA4 uses events to track user actions, and appointment bookings are perfect candidates for event tracking. JaneApp automatically sends certain events to GA4 once connected, but you may need to customize them.
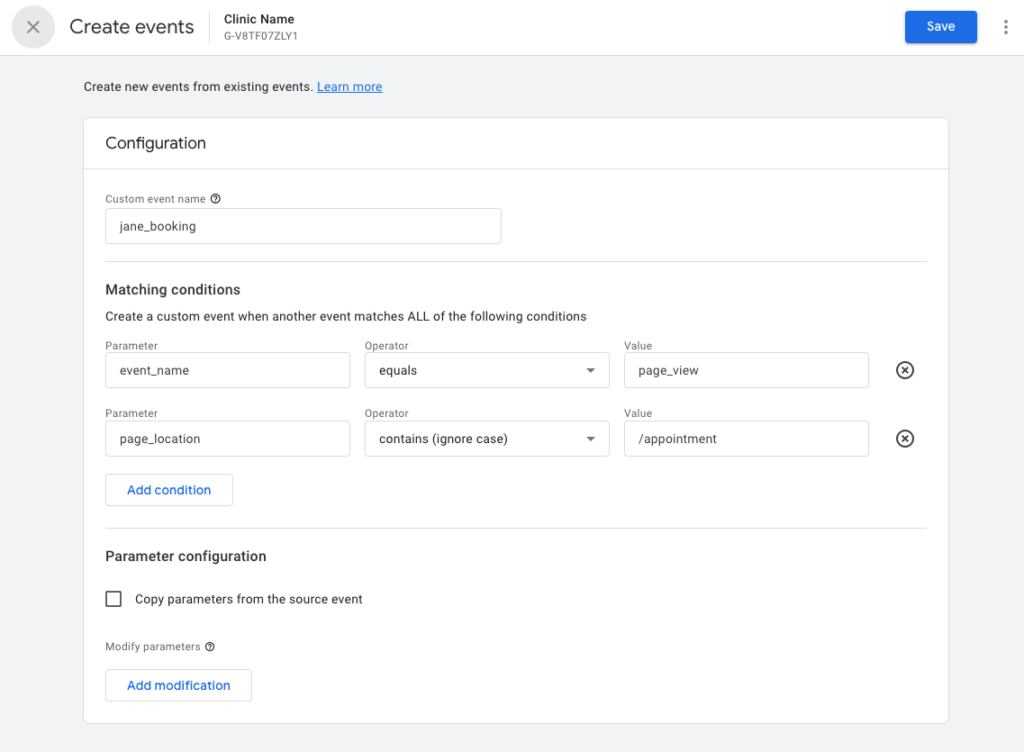
The most important event is when someone completes a booking. Setting up this custom event is fairly simple:
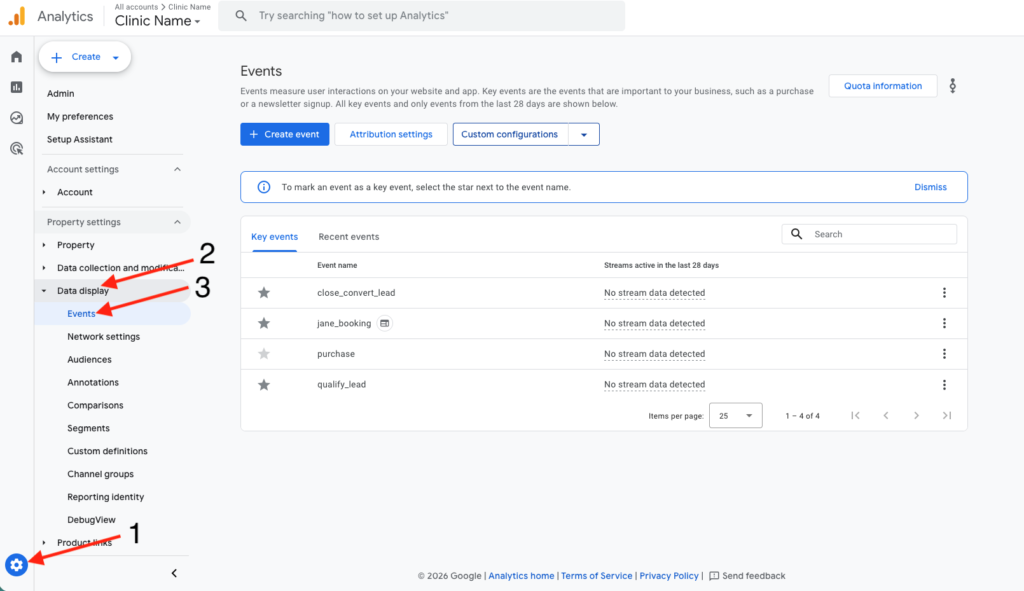
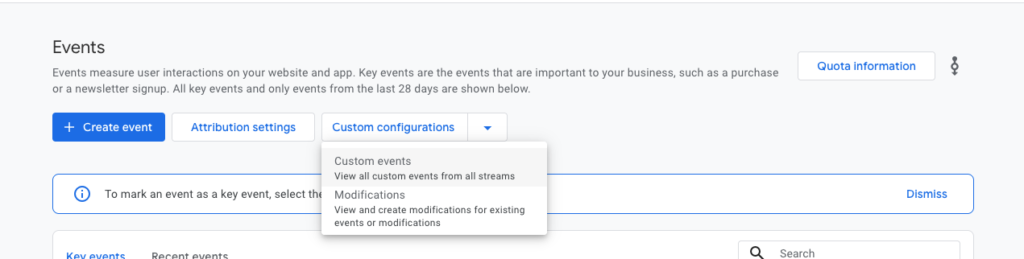
- Go to the Events tab in your GA4 admin (Admin -> Data Display -> Events)
- Create a Custom Event
- Name the custom event (ex. appointment_booked or jane_booking)
- Enter the following conditions
- event_name equals page_view
- page_location contains /appointments
Designating Appointment Bookings as Key Events and Conversions
Key events (previously called conversions) tell GA4 which actions matter most to your practice. Open your GA4 property and go to Configure, then Events.
Find your appointment booking event in the list. You’ll see a star next the event name, click that star to mark it as a key event.
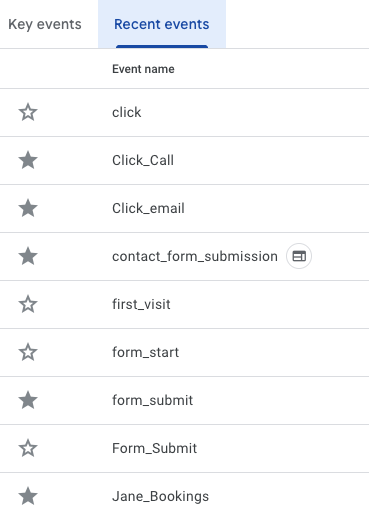
This tells Google Analytics 4 that appointment bookings are a priority metric for your practice.
Once marked as a key event, your booking data appears in conversion reports and becomes available for optimization in Google Ads if you use it. You can now track how many appointments come from different sources, which marketing campaigns work best, and where your patients find you online.
Optimizing Attribution and Data Flow for JaneApp in GA4
Getting your data to flow correctly between JaneApp and GA4 requires proper cross-domain setup, configured data streams, and thorough testing to ensure every booking gets tracked accurately.
Implementing Cross-Domain Tracking Between Website and JaneApp
Cross-domain tracking lets GA4 follow users from your main website to JaneApp’s booking system without breaking their session. Without it, GA4 treats each domain as a separate visit, which messes up your attribution data.
You’ll need to configure this in Google Tag Manager. Add your JaneApp domain to the cross-domain tracking field in your GA4 configuration tag. This typically includes your JaneApp subdomain (like booking.yourbusiness.janeapp.com).


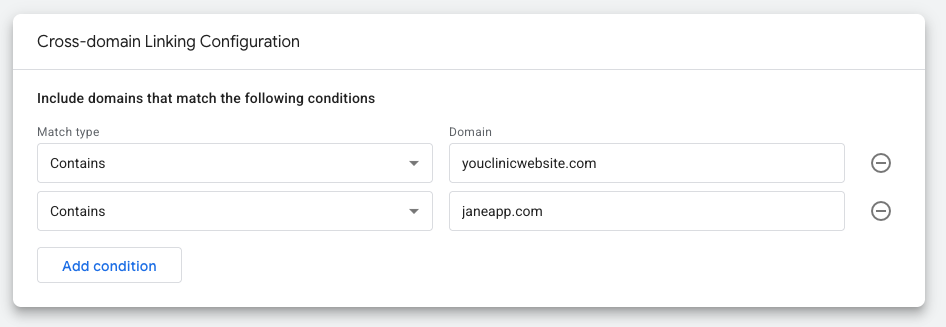
The setup passes measurement IDs through URL parameters. When someone clicks from your site to JaneApp, GA4 maintains their client ID and session information. This means you can see the full journey from initial website visit to completed appointment booking!
Test this by checking your GA4 real-time reports. Navigate from your website to JaneApp and verify that it shows as one continuous session, not two separate visits.
Importing Conversions into Google Ads
GA4 conversions need to be imported into Google Ads to optimize your ad campaigns based on actual appointment bookings. This connection tells Google Ads which clicks lead to real business results.
Link your GA4 property to Google Ads through the Admin section. Go to Google Ads Links and follow the setup process. You’ll need admin access to both accounts.
Once linked, mark your JaneApp booking event as a conversion in GA4. Then import it into Google Ads as a conversion action. This lets you track cost-per-booking and optimize your campaigns for appointment conversions instead of just clicks.
The import process can take 24-48 hours to start showing data. Check your Google Ads conversion tracking to verify bookings are coming through correctly.
Testing and Troubleshooting Your Setup
Testing catches configuration issues before they corrupt your data. Start with GA4’s DebugView, which shows events in real time as they fire.
Enable debug mode in Google Tag Manager’s preview function. Walk through the entire booking flow from your website to the JaneApp confirmation page. Watch DebugView to confirm each event fires with the correct parameters.
Check that your GA4 tag fires on the confirmation page specifically. If it’s not triggering, verify your trigger settings in Google Tag Manager match JaneApp’s actual confirmation page URL.
Common issues include missing cross-domain parameters, duplicate tags firing, or incorrect event names. Use your browser’s developer console to check for JavaScript errors. The GA4 tag assistant Chrome extension also helps identify problems with your implementation.
Get a free clinic marketing audit